9 November 2013

Ranger Glossy Accents!

Wow. I haven't had the chance to update here in too long! I have actually been very busy... I haven't even managed to do any Halloween themed posts :( Maybe I'll make a post later about what we did!

Back on to the subject though, a while ago when I was trying to find some where that stocks craft resin I discovered Glossy Accents - which is basically a glue which is used for making embellishments. According to the packet, it is a 3-dimensional, clear gloss medium that dries to a hard clear and resistant finish. Here is a picture of the product I'm talking about:
(http://www.craftobsessions.co.uk/ranger-glossy-accents)
Today I'm going to be doing a sort of review about it. It's not exactly going to be a review though, more looking at the sort of things you can do with this.

I have been using it on normal metal embellishments to create a resin-like effect. I took the embellishments and put them on different types of paper or card, then used Glossy Accents on them. At first, it comes out a cloudy colour.


You can add glitter, rhinestones/pearl things after you put the Glossy Accents on.


Sorry you can't see this picture very well! Try not to mix it too much, or else a lot of air bubbles will form in it!

You don't just have to use on the sort of embellishments that have gaps in either - here are some butterflies I used without paper.


On the packet, it says it will take 15 - 60 minutes for it to dry. However, I've found that one hour is only long enough for the surface to dry, and not long enough for the whole thing to dry - even on the butterflies. I had to leave mine over night for them to dry fully, but the effect that was made when they finished drying was really pretty!


I love how these have come out! All you have to do now is cut around the edge of the embellishment to remove the excess paper.


And it's done! The even better thing about doing this is that if you are allergic to nickel like me, you don't have to worry about buying the more expensive nickel free embellishments because you can use the Glossy Accents to cover it so it won't hurt you. 

Click to enlarge!

I have lots of these little birdcages, so I tried them out on lots of different types of paper and card.

13 July 2013

My little sister's dress is now finished!

So a few weeks ago, I made a post saying that I'd started making a dress for my little sister's birthday. I finished making it probably later on that day, but I didn't manage to make a post about it until now.

Here is the finished dress! I'm so excited about it :D

This is a close up on the eyelet lace I used. I got it from a local craft shop. I think it gives the dress a nice vintage feel.
This is a close up of the bodice. The buttons here are just a decoration and the bow is attached to a brooch pin and so it's removable.
This is a close up of the fabric used... just ignore the creases, lol!

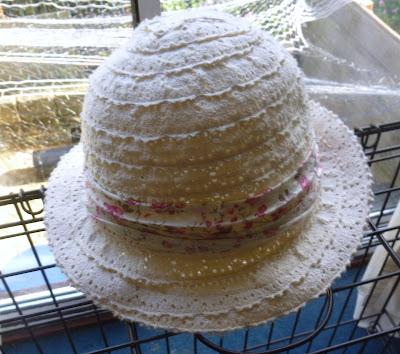
I also had a picture of it from behind but it has somehow managed to disappear... My sister also found a cute straw hat to go with it.
Isn't it cute? I also made a little bow to put on it but she's keeping that in a safe place.

3 July 2013

Crafts with Sapphire is now a year old!

I just realised the over day that my I made this blog just over a year ago :) I'm quite surprised as I never thought I could keep a blog for this long.

In the past year I've managed to some how get 1,500 hits on my blog. Unfortunately, I'm still to shy to allow comments... so I lose out a lot there. I hope I'll manage to keep up with this blog for another year ;)

The progress on my Etsy store is also back on. I will be using this blog to update my progress :)

16 June 2013

Finally I manage to make a craft update.

I don't have much followers, but I'll explain why I haven't been updating or anything for ages anyway! I've just finished some major exams (which naturally, involved major studying) so crafts had to go on hold for a while. But now I've finished my exams and don't really have that much to do... Perfect conditions for updating my blog :D Another thing is, I GOT A NEW COMPUTER!!!!! Finally, a computer that works :D (Only problem is, I have no idea how to use Windows 8...)

My Deco-notebook-thing!
So I remember I said a while ago that I'd made a decoden notebook (And now I realise how little sense that makes, as the 'den' part of decoden is a shorter form of the Japanese word for 'phone'). And here it is! After about four months since I did the decoden on it! 

close up of the deco part
Sorry you can't see it very well (the battery on my camera was running out), but it has one blue macaron in the corner and two rhinestone/pearl thing hearts at either side. 

WARNING: before you try doing decoden on notebook, try to do this on one you don't use very often/is full. It's near enough impossible to write inside your book after you do this! Trust me, I learnt the hard way!

Memory wire earrings!

I really love the way these turned out! 

Sorry I took it on my bad ear...
I really like these earrings and can honestly see myself selling ones like these in the future because they look almost like shop bought earrings (well to me, anyway). I think these are definitely one of the best pairs I've made so far. They aren't too hard to wear either, as they feel very light, which is really important because since I have such thin earlobes, I often can't wear earrings like this as they tug and pull on my ears too much and are really uncomfortable. But as you can see, they hardly tug on my ears at all!

Sorry the picture is so bright, I need to install Photoshop again...
Here's a better picture of one not being worn. As you can see, It's basically just memory wire pulled in to the shape of a tear drop/egg, and a head pin with matching beads attached to the jump rings that pull the ends of the memory wire together. It's a very basic design, but it works really well.

A dress for my little sister's birthday! (Not finished yet)
I just need to finish sewing the lace at the bottom. My sister loves lace.
So, a few weeks ago I acquired a very old sewing machine from my Grandma (thanks, Grandma! Even though you don't have connection to the internet and so will probably never see this!). The tension messes up a lot, but still, It's much easier than having to sew the whole thing by hand. I only have one picture of it at the moment, but I'll take more when it's finished as my sister wants to have a picnic for her birthday party. I know that sounds a little strange for a 9 year old these days, but she really wants to have one, and hey, it's HER birthday! (starting to go off topic, are we?)


I also managed to make macarons! For my first try, they don't look that bad. They're strawberries and cream flavour, but the shells are just plain. We tried to make them pink, but they came out more of an orangey colour. They tasted really good though! It's the first time I ever ate macarons too, but they were great :D I bet I'll have to make some more for my sister's birthday!

19 March 2013

Time for another update!

So, I haven't really got round to posting lately. I'm thinking of doing a massive craft update sometime soon, but today I just feel like making a post about some interesting stuff that's happened lately.

I made a post a while ago saying how I wanted to start selling my things at some point in the future. Well, I've been doing a LOT of research lately, and my parents are finally beginning to accept the idea of me selling my handmade stuff. Mainly because they just happened to run in to one of their friends who told them that I should start selling my crafts. Anyway, I will be getting a Etsy shop sometime soon! I still have a lot of other things to consider before I start, though. I probably won't get one until after my exams in the summer, and it won't exactly be my own account then because I'm only 17... but I'll keep my progress updated on here!

A few weeks ago, I also uncovered something I thought I'd lost forever! 

a box???

It's my old lucky star box :) 

this picture looks so much more interesting.
It's so exciting!!! I literally thought I'd lost it (and it was in the box I keep most of my craft tools all along...) so I'm really happy!

Here's all of them in a pile on the carpet :D As you can see, they're not all perfect! I started 'filling' this box with stars when I first learnt how to make them when I was 15. So, it includes all the bad ones from when I first started! 

Here's some of the nicer ones :D They look really cool like this (well, to me anyway). I don't want to use these lucky stars for anything, they all feel quite special to me. But I've been making ones to use for jewellery, and I might make a few to use for decoden. I've been using a glaze made for polymer clay to make them stronger lol! (really says something about my crafts...)

So, that's it for this update! The next post I'm making is going to be about all the crafts I've made. I'm not exactly sure when I'll make another craft tutorial, I don't seem to have any awesome never been done before ideas for a tutorial. 

9 March 2013

5 Crafts I'd like to try

Since most of my posts lately seem to be about decoden, I've decided to make a post about some other crafts I'd like to try. This will mostly be jewellery related stuff with a few other things mixed in.

http://www.amazon.co.uk/Victorian-Diamante-Pendant-Necklace-Antique/dp/B005RR0XJY
1. I'd love to try hand carving one of those Cameo Pendants out of polymer clay! I love the way they look, and I know a lot of people make them using molds... but I just can't imagine buying already made molds off of the internet! Most cameos are actually carved out of stone or sea shell, but I want to make one out of clay. I know it can be done!

This is probably the one I want to make the most. I haven't had much experience carving polymer clay, but I know the very basics on how to do it. I can't wait to try it out!

2. I want to try to make a really intricate Victorian style Choker like the one on here. I've already made a few ribbon chokers, but they're nothing really compared to the sort on that website. The problem is, I need to buy in all the things I need for that project, and I don't really like having to do that unless I really know what I'm doing. Another thing is, I've never really tried anything like that. Maybe I'll try it when I've had a lot more practice with jewellery making (and have more money).

3. Resin Charms! There are so many different styles you can make with them! I'd like to try making the 'kawaii' or cute style ones, like the ones here! I know this will sound a little strange, but I kind of like the idea of being able to use real sweets in crafts with out worrying about them going all nasty and mouldy (no air gets in resin)! I'd also like to try different styles I've seen, like these steam punk style ones. I don't have any resin at the moment, but I hope I can find some someday! 

4. I'd like to try Mokume Gane with polymer clay. I'd like to try making some with gold leaf like the ones here, but I doubt that's going to happen lol. 

5. I never actually learn how to make Friendship Bracelets. I'd like to have a go at learning how to make them. I have no idea when I'd actually wear them, but it would be fun to give them a try. I'd need to buy lots of cord of course, since you need about 10 miles of cord for one bracelet (ok, that was a little sarcastic, but you really need a lot of cord!)

So, there's five of the many things I'd love to make, but I'm not exactly sure if I'd ever be able to! If I do manage to make any of these, I'll definitely make a post about it :)

2 March 2013

Racoon Honey Whipped Cream Clay

At the moment, I'm doing a lot of decoden! Since I refuse to use caulking silicone (why yes, I do like taking things to extremes!), I've had to look for alternatives that are actually meant to be used for decoden.

I'm currently looking for a product that has little odour (this is probably the most important point, as strong smelling products tend to give me a migraine), is soft and looks quite realistic. Another point that isn't so important is that I could do with something that feels like real whipped cream when you pipe it, as this would make it easier for me to use for decoden as I've already had a lot of practice piping real whipped cream (on real food of course, I wouldn't use real cream for decoden!!!)

This isn't really meant to be a review, but I've recently found a product called 'Racoon Honey Whipped Cream Clay'. It comes in lots of different colours, and where I live, is a lot cheaper than caulking silicone. Another point I'd like to make if you're in the UK: I found a website called 'Candy Crystal'. It's based in the UK, and only takes two or three days to ship to where I live. They have lots of cabochons, Japanese deco supplies, canes and lots of other things! They also stock this whipped cream clay in 30g bags and 100g bags.

This is what it looks like (ignore the rubbish in the background and my shadow please!):
this is a 100g bag in 'vanilla white' colour.
As you can see, it comes in a piping bag ready to use. It also comes with one metal piping tip:
Which is in the top of the piping bag... At first this worried me, as I wasn't sure if the clay would stick to it or dry up if I opened the bag to get it out. Although, when I opened it, it came out quite well and didn't get covered in clay! All you have to do to get started is cut the tip of the bag off, and attach your piping tip. I find it's best to secure the piping tip on with tape (but if you prefer having messy fingers, you can hold it in to place with your hand).
Sorry I don't have any pictures for this, but the next thing I did was test it out. It's extremely soft, and feels like real cream! However, it does have a very strong smell.

So the next thing I did was try it out on this box. It's very nice to pipe! It's so smooth :)


After leaving to dry...

So, here's the finished box. With cabochons. And ribbons. And rhinestones.

Here's the biggest problem:
I don't know if this happened because of the whipped cream clay, or the air dry clay. All the charms that were made from air dry clay had this problem. As you can see, parts of the air dry clay broke off and stuck in the whipped cream clay. I had to glue them all back on using a glue gun:
Oh yes, look at the lovely picture of me glueing the charm back on
with my PINK glue gun.
I didn't really mind having to do this, as I already needed to use my glue gun for something else. I'll be using this cream again to find out if the same problem happens with polymer clay, as all the other things I put on this box stuck fine. For this reason, I'm not sure if I want to use this whipped cream clay again as I shouldn't have to glue the charms back on, but it's still a nice alternative to caulking silicone.

EDIT: I've found that this happens because of the sort of air dry clay that I'm using. At the moment, I've been using FimoAir, which is ok because It's so easy for me to get and has such a nice texture to it. However, it is NOT waterproof. I find that when I use it with the whipped cream clay, it gets soggy and breaks up, leaving a few tiny pieces in the whipped cream clay.

Apart from this, this clay works quite well. I've even tried it on a notebook and it came out very nice. I'd like to see how well it does in water, though. I doubt that any of my deco stuff will get wet, but it would be nice to find out whether it is. I'll definitely be using this again!

23 February 2013

Decoden! (in the process...)

Well, I decided to do some more decoden. I still had quite a lot of silicone 'whipped cream' from my last box. In this post I'm going to be showing pictures of how it looked as I made it, with a few tips and techniques.

So, I took this box that I got a long long LONG time ago when my dad bought me a watch (that I've definitely had since before I was thirteen because it has leather on it, nowadays leather makes me throw up). I tend to keep boxes like this because they're good for keeping stuff in, I use this one mainly for hair pins.
from the side :) I really like the pattern on this box, it's really
pretty!
Here comes the 3D paint! I'm using Tulip. I suppose this is like icing? I'm not exactly sure what I should call it. I painted some over the top, then painted some dripping down the sides.

As you can see, I didn't make the drips too big! I was frightened that if I did it would become another failure box :( Also, I need to leave some room just in case this box requires a ribbon. No, I don't decide to add a ribbon. The box does.

NOW FOR THE BEST PART!!!! (if you like piping chocolate stuff on your box, that is)

I've Improved lol! It looks a lot better than my last box. (feels proud) I suppose you could just leave it like this, but I'm putting cabochons on it. And rhinestones. Not to forget the pearls. Oh, and cane slices. Maybe even a few beads.
 Now, this is why you DO NOT try to attack Sapphire's crafts. I originally had a bow in the middle, but my sister decided to rip it off! So, she now knows very well why you don't try to destroy my Decoden. I ended up staying up really late to correct it... (yawns)


So this is what it looks like now I've cleaned the paint up a bit. I know very well that I could have waited until the morning to sort is out, but no. Of course not. 

So, anyway, I used all the same things that I used last time, except for one thing. I used some cabochons that I had made out of air dry clay. I used Fimo Air. I haven't tried any other types of air dry clay, but I really like this one. 

On another note, my mum decided to buy all this cereal.

Fortunately, I love cereal. With skimmed milk of course, anything else is just too creamy for me. Yes, I am a little strange, aren't I?

17 February 2013

Triple layer bracelet!

Yeah, there's a big story behind why I decided to make this! So, my sister bought a bracelet at her school one day (they were having a Summer fair), and I thought it looked really cool and decided to make one! I searched the internet, in the hope I would find a tutorial, but nothing. I really could not find any tutorials. Obviously, other people had had the same idea, because I was finding pictures that looked very similar to it. So, rather than giving up (I'm just too stubborn!), I had a good look at my sister's bracelet and realised it really wasn't a very difficult thing to make at all. I decided to get all of my stuff together and make one myself! I had to make some of the beads myself, and this of course had a nasty effect on my lovely bead collection (I literally had to use all of them!).

So, here are a few beautiful picture of my arm I mean, my bracelet:


I like the way this angle of my arm looks for some reason...
And one with out my arm:

Sorry for the blurry-ness!
As you can see, it just won't stand up on it's own. I think this is because of the cord I used, but I don't think it really matters. Here's a picture of it next to my sister's bracelet (I didn't steal it btw, she let me borrow it for my blog!):

I love the way they both look together! they are both very colourful. I don't normally wear very bright jewellery, but I love these bracelets. They are very good for stacking bracelets, and I'm definitely the sort of person who likes to wear lots of bracelets at once. However, I haven't really worn this bracelet much. It just doesn't match the sort of clothes I wear. I'll probably be selling it at some point in the future, in fact. Not that I don't like it, it just isn't really me.

Anyway, I do plan on making a tutorial on the pattern for this at some point! I just don't have enough beads left at the moment to make another one. So watch this space! :D

10 February 2013

Another Decoden Box!


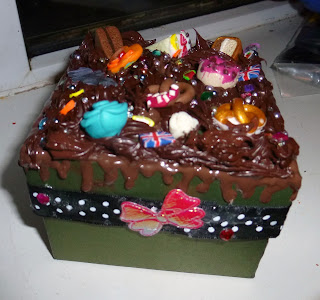
So I managed to get some silicone! And not the stuff that belongs on tiles and in walls :) The only problem was, it didn't stick very well at all so it was pretty much impossible to pipe on to the box at first. I felt a little ripped off lol. I did get it to work in the end though, and I think it came out quite well for my first time using silicone. And, another plus to not using the stuff that belongs in walls, it didn't stink at all! In fact, it was pretty much odourless.

Here's what I used to make it:


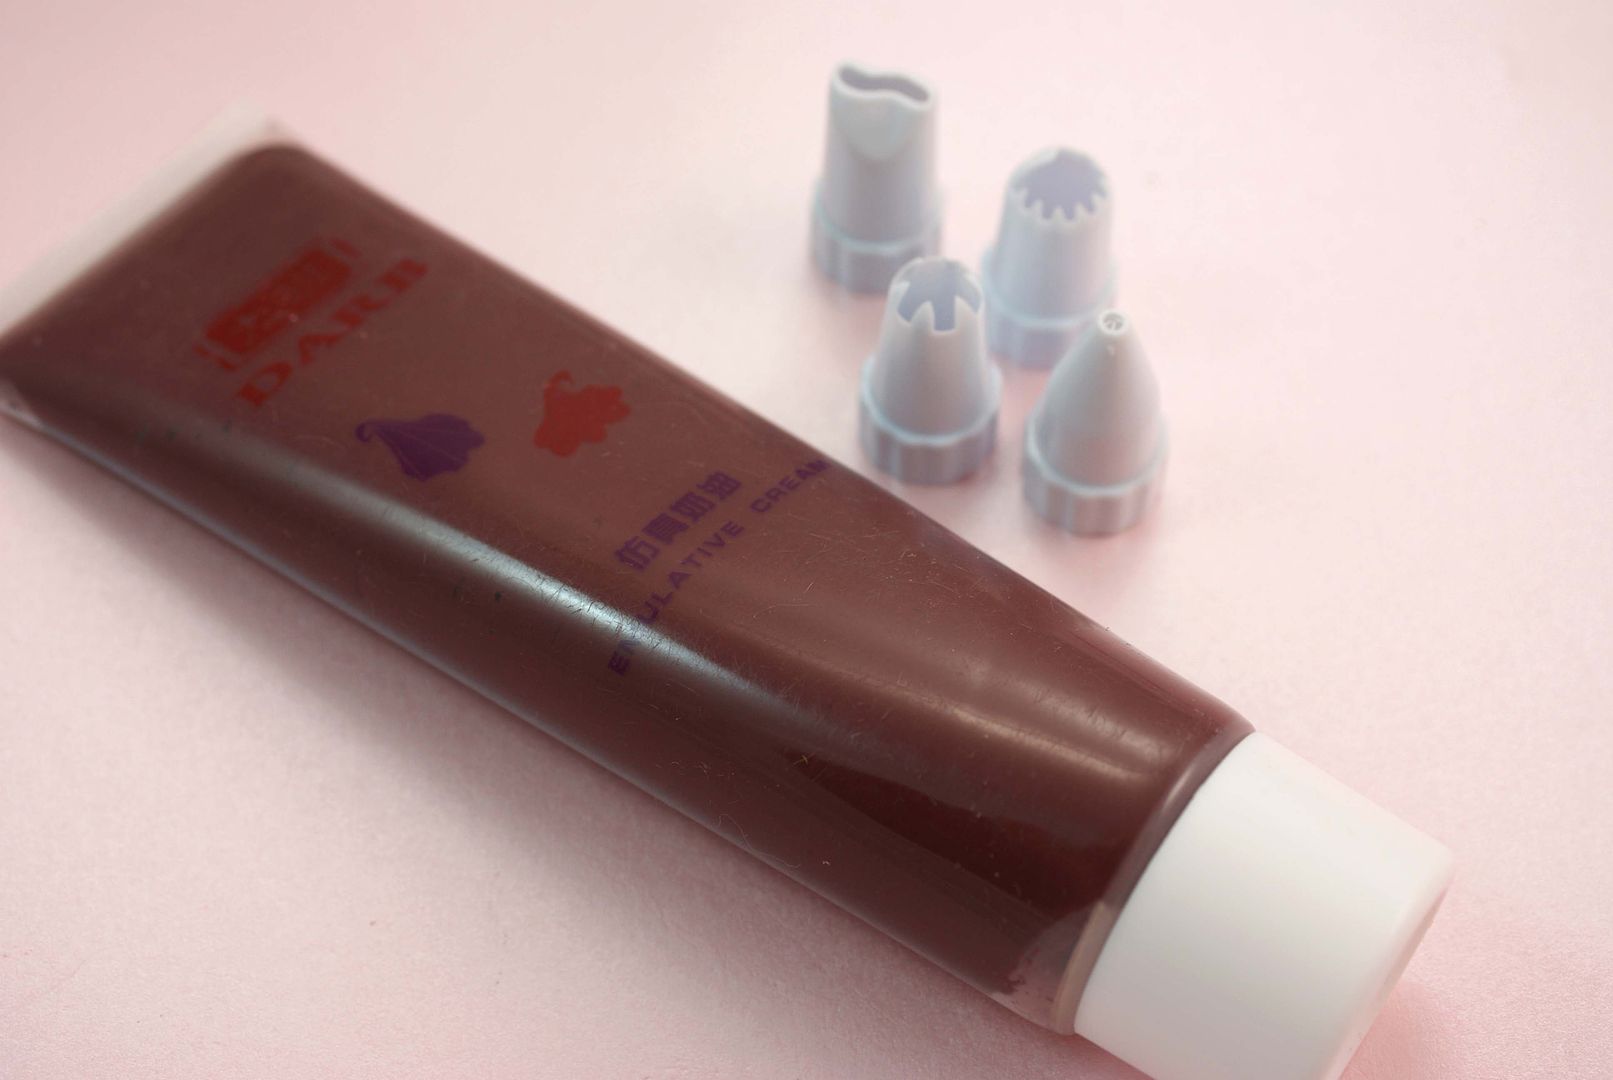
  • Silicone (of course). As already mention, it wasn't sealant or caulk. That stuff belongs in walls, for a start. It won't last if you use it for Decoden... it'll get dirty and don't forget it absolutely stinks. Anything that smells that bad is obviously bad for your health! Anyway, the stuff I used was made purposely for Decoden (like I'd use anything that wasn't!). I got it from Ebay, but it's not in stock any more. In fact, when I bought it there was only brown left. But I would've bought this colour anyway.
  • 3D paint. The brand I use is Tulip, mainly because it's the easiest one for me to get.
  • Polymer clay. I used it to make the charms or 'cabochons' whatever you call them. Most of them I'd made ages ago, but hadn't used for anything. So they got recycled. Oh, and I used a few cane slices I'd baked too. I even put a few Union flags on it, just to show people that just because you're interested in something that originated in Japan, you're not so obsessed with Japan that you wish you were Japanese and hate your own nationality for it lol.
  •  Rhinestones and pearls (with flat backs). I had to use the tiniest ones I could find of course. I also used a few of the slightly bigger coloured ones as well. 
I think I forgot something!
  • An old box that I keep my shop bought stud earrings in. A long time ago, I bought some earrings and this is what they came in. And some how, I ended up keeping all of my stud earrings in. Well, it's better than keeping them where they can get lost or stab you in the hand/foot. 
So, I'm quite proud of it for my first attempt at decoden with silicone! If you like the look of decoden, you should really give it a try.

Edit: I've added a bit more on to the box now! 

There were a few gaps in the silicone so I decided to fill them in. I also decided to add on a ribbon! I love it :D. I got the ribbon from a craft shop, and used a glue gun to stick it on. If you don't already have one, I got mine from Wilkinsons. I don't know if you have that shop outside of the UK, but any glue gun will do really. Most of the glue guns I've seen aren't really that expensive, but the majority don't come with the actual glue sticks. You can get the glue sticks from craft shops, DIY shops... and the packs they come in do contain a decent amount of glue. You don't have to just settle for clear glue either: you can get the glue sticks in all different colours and you can even get shiny ones with glitter.

I never actually took the label off of that box. Well, there's no way it's coming off now!