10 February 2013

Another Decoden Box!


So I managed to get some silicone! And not the stuff that belongs on tiles and in walls :) The only problem was, it didn't stick very well at all so it was pretty much impossible to pipe on to the box at first. I felt a little ripped off lol. I did get it to work in the end though, and I think it came out quite well for my first time using silicone. And, another plus to not using the stuff that belongs in walls, it didn't stink at all! In fact, it was pretty much odourless.

Here's what I used to make it:
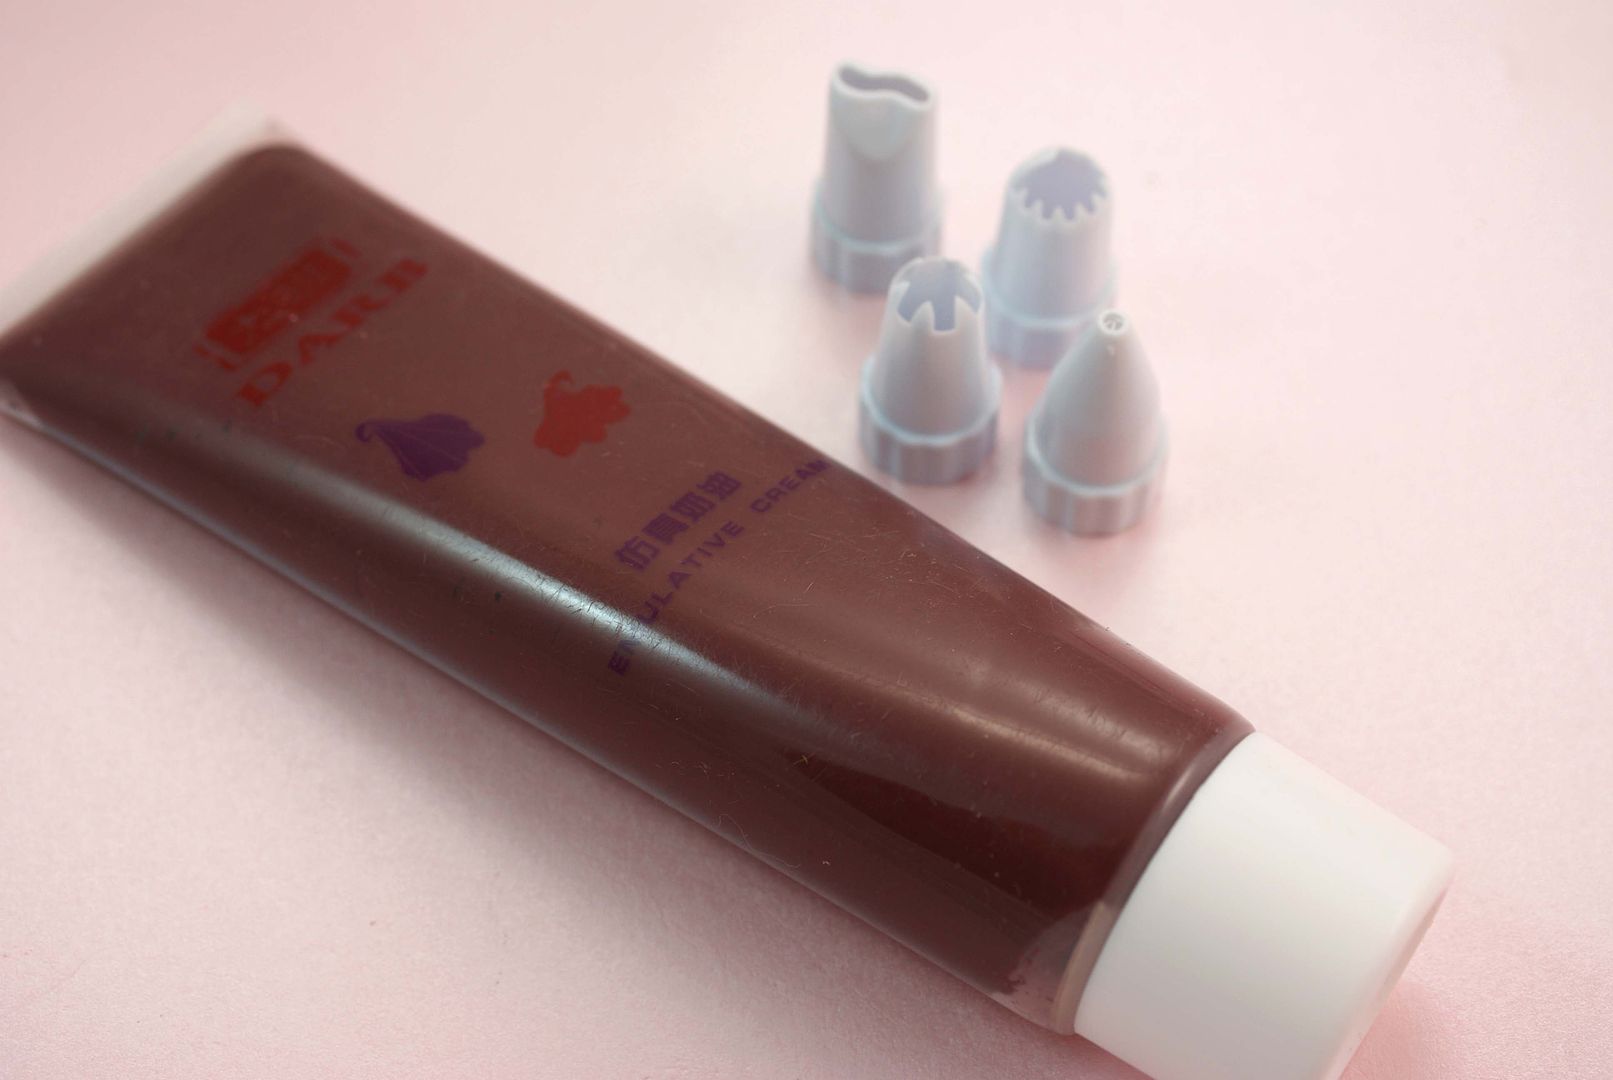

  • Silicone (of course). As already mention, it wasn't sealant or caulk. That stuff belongs in walls, for a start. It won't last if you use it for Decoden... it'll get dirty and don't forget it absolutely stinks. Anything that smells that bad is obviously bad for your health! Anyway, the stuff I used was made purposely for Decoden (like I'd use anything that wasn't!). I got it from Ebay, but it's not in stock any more. In fact, when I bought it there was only brown left. But I would've bought this colour anyway.
  • 3D paint. The brand I use is Tulip, mainly because it's the easiest one for me to get.
  • Polymer clay. I used it to make the charms or 'cabochons' whatever you call them. Most of them I'd made ages ago, but hadn't used for anything. So they got recycled. Oh, and I used a few cane slices I'd baked too. I even put a few Union flags on it, just to show people that just because you're interested in something that originated in Japan, you're not so obsessed with Japan that you wish you were Japanese and hate your own nationality for it lol.
  •  Rhinestones and pearls (with flat backs). I had to use the tiniest ones I could find of course. I also used a few of the slightly bigger coloured ones as well. 
I think I forgot something!
  • An old box that I keep my shop bought stud earrings in. A long time ago, I bought some earrings and this is what they came in. And some how, I ended up keeping all of my stud earrings in. Well, it's better than keeping them where they can get lost or stab you in the hand/foot. 
So, I'm quite proud of it for my first attempt at decoden with silicone! If you like the look of decoden, you should really give it a try.

Edit: I've added a bit more on to the box now! 

There were a few gaps in the silicone so I decided to fill them in. I also decided to add on a ribbon! I love it :D. I got the ribbon from a craft shop, and used a glue gun to stick it on. If you don't already have one, I got mine from Wilkinsons. I don't know if you have that shop outside of the UK, but any glue gun will do really. Most of the glue guns I've seen aren't really that expensive, but the majority don't come with the actual glue sticks. You can get the glue sticks from craft shops, DIY shops... and the packs they come in do contain a decent amount of glue. You don't have to just settle for clear glue either: you can get the glue sticks in all different colours and you can even get shiny ones with glitter.

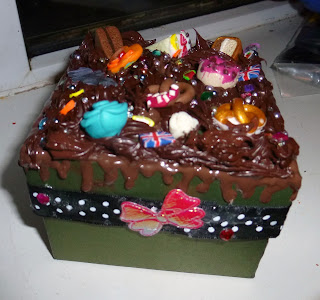
I never actually took the label off of that box. Well, there's no way it's coming off now! 

9 February 2013

Polymer clay Plumeria Flower tutorial (re-made!)

Real Plumeria flowers (I didn't make these lol)
So I've decided to re-make my tutorial on how to make Plumeria flowers! My first plumeria flower tutorial looks a bit messy to me now :( 

Here goes, then! You will need: clay (in one colour), a craft knife or blade, a teaspoon (that you will only use for clay) and chalk (or acrylic paint). You could also add a scent to make it smell all flowery and realistic.
1. First you need to condition your clay. You can either use your fingers, a pasta machine or a rolling pin. This part is probably the most important. Tip: If you're using white or light coloured clay, try not to touch it as much as you can. This will help keep the clay as clean as possible.

Optional: if you want, you can add a scent at this point. Just mix it in to the clay.

2. Roll out the clay and cut in to 5-6 pieces. Try to make them as equal as you can, but don't worry too much if some of the pieces are slightly bigger/smaller. Flowers don't all have perfect petals!

Here's pictures of how I did it: first I rolled it out, then cut it, and rolled each piece in to a ball.

3. Now for the fun part! Well, if you count squishing clay with a spoon as fun, at least.

This part is critical for giving the petals their shape! You have to squish the ball down and use the spoon to give it it's shape. When you pull it off of the back of the spoon, it will have a curved shape like the real petals. Do this with each individual ball.  Tip: if you don't have a teaspoon available (possibly because you need them for food), you can use your fingers and a paint brush. It's a little harder, but it can be done like that.

4. Now what you need to do is arrange the petals in to a flower shape. Use TLS or the Studio by Sculpey Bake & Bond Adhesive to stick the petals together.


5. This is optional, but I'll assume most people won't want to leave this bit out. You can either use chalk to add the second colour or acrylic paint (but you have to bake it first if using paint). Start by adding the colour in the centre, then use your brush to push it out. You can put in an eye pin now if you want.


Now blogger is annoying me... It won't let me add my picture how I want it to... lol. Anyway, I made a little mistake with that one, and used a brush I hadn't cleaned properly. So it went all sorts of crazy colours! All is not lost though - I can still paint it now it's baked! I'll add the picture later :D

Here's a picture of one I made a while ago (sorry for bad quality). I used purple chalk, then painted over the backs of the petals with white acrylic paint, so you can do something like that if you want!

27 January 2013

Ear Cuffs method 2

Hey, I bet you thought I was never going to make another ear cuff tutorial! Well, today we're going to learn how to make the really cool ones that connect to earrings! I'd just like to warn everybody and say: please make sure your piercing is 100% healed. New piercings rip easily, even after the initial 6 weeks. I guess it's especially easy to tear your earlobe with something like this! So please be careful, ok?

This is what it looks like so
far on my ear
We're going to start off by making a basic ear cuff, using the first method. I'm using a slightly different design and I'm using 16 gauge wire. You can use any design or thickness, as long as it starts with a loop and ends with a loop. If you like my design though, I don't mind if you use mine. Just try not to do it EXACTLY like mine please...


If you have some jewellery making earring studs like the ones in the picture to the right, congratulations! You've just made life LOADS easier, and can skip the first 3 steps! Tip: if you don't have pierced ears, you can use clip on earring findings!


1. We need to make the studs! As already mentioned, you can buy studs like these. I took some waste polymer clay and rolled it in to a ball. Then I actually took a clean, nickel free head pin and used it to make the post. I don't recommend doing this unless you're really sure you know what you're doing is safe, and won't cause you an infection (not all head pins are nickel free, the same thickness as normal earrings, etc). If you have some flat, jewellery making studs, use them.

2. Now you need to take a piece of wire and use it to make a short eye pin. Then you push it in to the clay and you're done!

3. Bake. You don't have to take the metal post or eye pin out.
4. While your stud is baking, you can do the next step! (of course, if it's not baking/you don't need to bake it, you still have to do this step lol!) We're going to put a jump ring through the lowest loop on the cuff. I'm using one of my larger jump rings. Now attach your chain. You need to make sure you have a good amount of chain, as this will connect to the stud. But not too much, or else you're going to just make it heavier and it just won't look as nice!

Now your cuff should look like this:
5. Oh, look! The stud part has finished cooking now! (I assume I will have startled at least one person by saying that lol) Now we're going to finish it up by attaching the stud! This part is simple: just use a jump ring to attach it to the chain.

Tip: If you have more than one piercing in your ear lobe, you can make a cuff with multiple studs connected to it. 

Ok, the next ear cuff tutorial I'll be making will be a little different! I'm going to be showing you guys how to make ear wraps, they're extremely similar to ear cuffs, but they sit behind your ear.

18 January 2013

How to get started with polymer clay...


So, I've been using polymer clay for just over a year now, and I'd like to give you guys a few tips for starting out with polymer clay! 


Fimo clay
The first, and most obvious thing you need to get started is polymer clay. Do your research before you go out and buy lots of clay! I guess this is one of the most common beginner trap to fall in to. When I first started, I bought a set of clay that contained about 12 different colours. Most brands do these sets of clay. However, this was a set of Sculpey III (3) clay, which in my experience, is the worst type of polymer clay. I know it works for some people, and it does make good canes, but it almost always breaks!!! And we're not just talking about it breaking a tiny little bit, we're talking shattering in to tiny pieces over time because it's so brittle! Studio by Sculpey seemed to work a little better, but it still breaks as it's not designed to be used for jewellery or charms. At the moment I only use Fimo because it's the easiest brand to get where I live - but I'm planning to try out more when I get the time! Anyway, always do your research before buying clay.

The second most important thing is the tools. When I first started out, all I had was Sculpey III and a mat (and of course an oven!). I didn't have a blade, needle tool, rolling pin... Or anything 'fancy' like that. Now, I don't know how I managed without them! My top five must-have tools for beginners are:

  1. A blade or craft knife! These are the most important tools. You need them for virtually every project. I use a craft knife with changeable blades. Personally, I find these nicer to work with, but that's just me. These are also safer because you can remove the blade completely when you're not using it, however, they're harder to clean as clay gets all in the pen part of the craft knife!
  2. Some sort of a rolling pin. It doesn't literally have to be a rolling pin - you can use pens (that are rounded in shape) or paint brushes (preferably the thicker ones). You don't have to have a fancy pasta machine when you're only starting out.
  3. Wipes - I always seem to use them! They're great for cleaning your hands, the surface and you can even use them to soften the clay itself! 
  4. A mat of some sort to use your clay on. 
  5. Scrap paper - scrap pieces of paper are really useful to have around. I use them for making templates and mixing liquid clay (which is useful to have but not a necessity).
As you go a long, you can pick up other tools (like liquid clay, chalk, pasta machine, extruder, etc), but these are the top five things I probably use for everything I make. You may however find that you already have some of these things lying around in your house. 

Another good tip is to watch videos of people making things with polymer clay on YouTube and look at plenty of tutorials. I have a growing collection tutorials here about Polymer Clay :D 


17 January 2013

Decoden box

So, I guess I realised I don't fail at Decoden as much as I thought I did. I had another go at it last night :D
In the process...
The finished box :D
It looks so much cooler in real life :) For some reason, I decided to use the slowest method possible and use about a million tiny rhinestones instead of using the larger pretend pearls or silicone. I guess I couldn't be bothered to wait until the next time I could get to the craft shop, order them off the internet or brave the snow. So I decided it would look more awesome like this, and spent about 3 hours doing it. Yes, I know there are better ways to spend a week off from school, but this seemed more appealing... lol.

Anyway this is what I used to make it:

  • 3D paint. I was having some trouble with it before, but now I've learnt how to use it... I think. You can get it from craft shops.
  • LOADS of rhinestones!!! I got the smaller clear ones from a craft shop, and the coloured shaped ones from the Works. (I think we only have it in England, but you can get get them like that from most craft shops)
  • Polymer clay. I mostly use Fimo at the moment. Some (not all) craft shops have it, but your best bet is to search it on the internet.
  • Some old embellishments I've had since FOREVER (well, since I was about 13 at least). I think I might have got them from a card making shop, but I might have got them from the Works again. They also came in the box I used to Decoden.
  • As for the glue, I used PVA, but I don't recommend it unless you really can't use any other sort of glue. I can't really handle the fumes from stronger glues, even in a well ventilated room. The same seems to go for most glazes :(. Anyway, I used a brand called 'Anita's Tacky Glue'. I find it's slightly stronger and seems to hold on to things better, so if you really can't use any other sort of glue, you should try this. If you can use super glue/glue guns, it would be much better to use them. (Edit: I've had to re-stick some of the charms back on using a glue gun. I really don't recommend using PVA glue, unless you really can't use any other kind of glue).
My sister made this charm... Now I have to
pay her £1 for using it...
If you like the look of Decoden, you should really give it a go! Just don't make the same mistake I did with my Nyan Cat box, and just rush in to doing it. I find it's best to either plan out what you're going to do or have a good idea of it in your head. Before you use 3D paint, test it out on paper to get the feel of it. Let it dry before you do any thing else. This way, you can see how it works with out making a mess of your box! I know it looks easy, but it's very different when your doing it yourself for the first time. 


13 January 2013

What's New in the Nyan Galaxy?

So I've been trying a bit of Decoden, and I needed a new box to keep all of my stuff in. I got an empty ice cream box (which had been cleaned good of course) and turned it in to a box for my stuff :)

But I'm having a bit of a Nyan Cat phase at the moment!

So, I guess you guys can watch my fail attempt at Decoden as I make it... I've already done half of it though!


Welcome to Nyan Galaxy!!!! (lol, I had to!)

First, in Nyan Galaxy, we come to the Pop tart cat! Wait, is Nyan Cat a girl or a boy?

 S/He is having an amazing time flying whilst pooping rainbows across the box! I made the pop tart part first, by using tan coloured clay to make the shape of the pop tart, then putting liquid clay mixed with pink clay on the top. Then I placed red sprinkles on it. After that I made the body, using wire to keep it secure in the clay. After that I baked it, attached the rainbow, and baked it again. There, one Nyan Cat!

Unfortunately for Nyan Cat, s/he is heading straight for a massive chocolate waterfall!!!

FAIL!!!!!!
So, it started off ok, then it turned in to a fail! It's just 3D paint, beads, and a few cane slices. When I get round to it, I'm going to sort it out by painting over the parts that went all flat and weird.

NEXT TIME ON NYAN CAT GALAXY.... I'll be making more fail decoden!!! If I can, I'll try to get my hands on some whipple cream (Which is fake whipped cream!). I know this deeply offends some people, but I think I'd rather make my own. I have all the stuff I need at home to make it, so why bother buying it? It's a waste of money! (Sorry for offending every whipple fan in the world lol!)

(Edit: I have now made a decoden box that doesn't fail so badly!)

31 December 2012

Plans for 2013...

It's New Year's day tomorrow! AND my birthday :) It's less than 24 hours now until I'm old enough to learn how to drive lol! Even though I'll probably be like 30-something years old by the time I have enough money for driving lessons (sighs).

I've been planning to start selling some of my handmade stuff for a while. I'm currently trying to work it out so I can at least make a profit from it :) My mum and dad think it's just a waste of my time, though. I'm mostly on my own doing this... Not even my friends are really being much help. They just keep telling me that  I should sell things. I suppose there isn't that much they can do anyway at the moment.

So anyway, I'm going to start selling things at some point hopefully in 2013 :)

I hope you all have a happy new year :D I probably won't update for a while after the holiday because I have exams :(

I've managed to put the Blog back in to the right time zone again btw. I was annoyed at the times always being wrong, but didn't realise it was because it was set in an American time zone...